Baltresto barrel sauna review
Joern Kahn, the owner of the HeimHausGarten online- platform, shared his experience of assembling a sauna in our blog. Enjoy the reading!
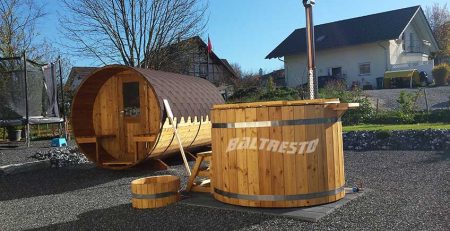
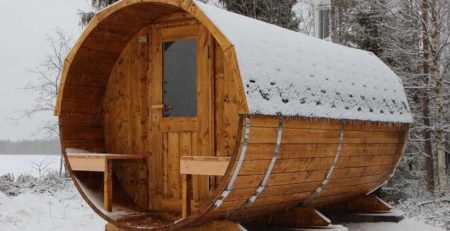
In search of a barrel sauna for the home garden, the search on the Internet and also local gives a lot. The market now offers many dealers and manufacturers that offer garden saunas in the special barrel shape. While searching, we discovered Baltresto and were persuaded to order a barrel sauna online there. We are now talking about the experience with Baltresto as a company, as well as their barrel sauna.
-
 Select options This product has multiple variants. The options may be chosen on the product page
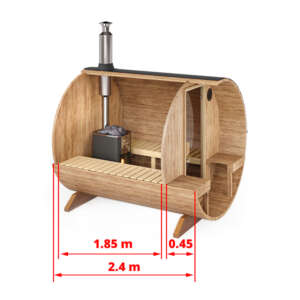
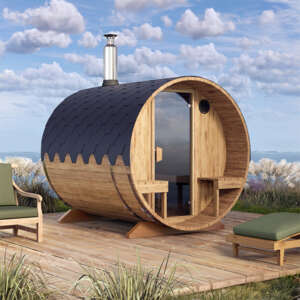
Outdoor Barrel Sauna S2V with Outside Seats for 4 People
From: 2 550 €Select options This product has multiple variants. The options may be chosen on the product page
Ordering process and customer support
First and foremost, it is commendable that German customer support always has an answer ready and sticks to agreements. A satisfactory answer was always given by phone, email and live chat and deadlines were met.
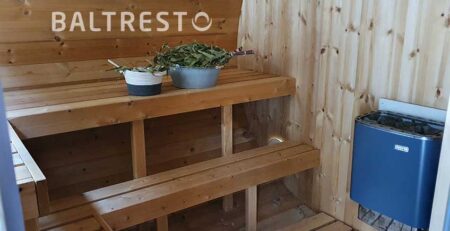
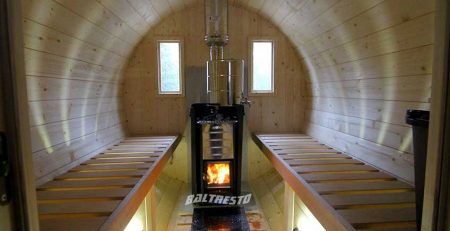
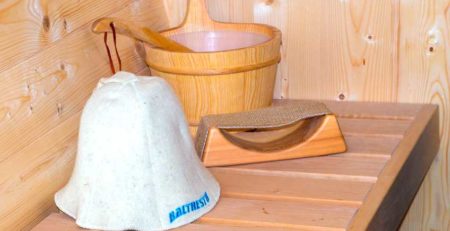
In contrast to other providers, Baltresto offers a variety of options for configuring your barrel sauna according to your own wishes. For example, you can choose whether windows should be installed on the front and rear. In addition, the tint and the closure can be chosen. Of course, an oven should not be missing either. This can be ordered directly for a small surcharge. Of course, any electric or wood-burning stove can be installed. We have opted for the electric oven so that there are no problems with the parking space and official permits. In addition, the oven also heats up instantly, and everything is less complicated. Additional barrel sauna accessories can also be ordered, e.g. B. Floorboards so you can walk on a straight barrel and a backrest for more comfort. All this is of course reflected in the price.
Production Time and Delivery of Barrel Sauna
The production and delivery was much faster than stated online. The order from March 1, 2022 was already shipped on April 6. So we are not talking about the specified 13 weeks, but only a good 4 weeks. We were of course very pleased about the notification, because we could hardly wait to finally build the barrel sauna.
The shipping company contacted us by phone shortly before delivery and made an appointment for delivery. This was done without any problems on a stable pallet. Pleasing were photos of the pallet including delivery bill with my name next to the shipping mail. As expected, the delivery was complete and without defects, which meant that the assembly of the barrel sauna could start promptly.
Set up Barrel Sauna Step by Step
However, before venturing to assemble the barrel sauna, some precautions should be taken. Since, as mentioned at the beginning, we decided to use an electric heater, the barrel sauna could be placed close to the property line.
Site Preparation for Barrel Sauna
For this we made a small foundation with simple curbs in the dimensions of the sauna. The topsoil was then removed and everything was compacted well with a hand tamper. After that, a layer of gravel was spread on top and compacted as well. To protect the sauna from underneath, we laid a weed film over the surface. Four concrete slabs, which are about higher than the foundation, provide a secure footing. This allows rainwater to run off and the feet of the sauna are always dry. According to the manufacturer, the weight of a fully assembled barrel sauna is about 630 kilograms. That’s quite a bit and should withstand storms. Nevertheless, we will additionally fasten the feet to the concrete slabs with storm anchors. The whole thing also provides a little more stability. With the spirit level we should check if everything is in balance, so that the barrel sauna stands straight. When the foundation of the barrel sauna is in place, the construction can begin.

")


Barrel Sauna Assembly
We recommend that you place all the parts near the installation site before assembly, so that you have an overview. You should start the assembly of the barrel sauna with at least two people. You start with the feet and the front and back wall. Starts now always alternately on each side upwards away wooden beams to lay. It is important that the groove of the board always points upwards, so that no rainwater can accumulate in the groove. According to research, inexpensive models up to about 2500€ run only in one direction, which can cause waterlogging in the tongue. You can also see it on the product photos and thus recognize whether the manufacturer has thought of this problem.
Now alternate the tongue and groove boards until you have reached the top. A ladder and a rubber mallet are also helpful here. The boards should also be fixed with screws. Once you have reached the topmost point, there should be two boards left. One narrow, as well as half a board. The top boards should not be screwed in place for now, so you can slide the two narrow boards in more easily. If you are lucky, it will fit perfectly right now. But it may be that the narrow board does not want to fit. Then you need to cut off a few millimeters in length. If everything fits, fix the boards now with the screws.


We have also opted for two small windows. Alternatively, you could have left the wall closed or chosen a large panoramic window, at extra cost of course. So, for the installation of the windows, you have to do it again by hand. The illustrated instructions describe exactly where to cut out the windows. A jigsaw should be here for necessarily to the side. With a large drill attachment, you can first drill a hole where you can then start with the jigsaw. After the openings are sawed, the windows can be inserted and screwed into place. Baltresto recommends using assembly foam here. We put tamping hemp in there to seal the window. In addition, in the window set you get wooden frames for the interior and exterior. This closes the small gaps.
Then follows the first coat of paint. The wood of the now finished sauna should be completely painted once from the outside. Recommended are 2 in 1 wood glazes. Once the glaze has dried, you can put the enclosed metal tension straps around the barrel and tighten them. This turns out to be difficult as the thread was not long enough. A hint would have been super that you can help yourself with a tensioning strap to pretension, so to speak. This will make it easier to install the metal band. Place the screws for tightening best in the lower, easily accessible area of the barrel sauna, so that the later mounted roof shingles do not cover them.
Then place the roof shingles exactly according to the instructions. It is important that the first row protrudes at the front as shown in the picture, as you will have to cut this piece off and will need it again for the next row. Then repeat this until you reach the middle of the sauna at the top. Then start on the other side. Baltresto has even donated some replacement roof shingles. However, it is best not to wear them out. Once you have reached the top with the second side, press all the shingles down again so that the glue sticks. Finally, nail the long strip in the middle of the barrel sauna. The next step is the interior of the sauna. Mount the reclining areas, as well as the seats outside. The two ventilation frames you simply mount at the holes provided for them and screw them tight.
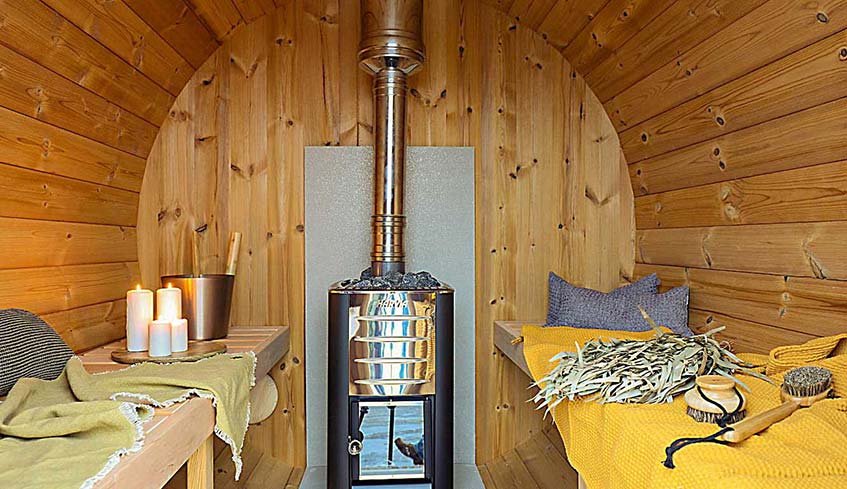
Last but not least, the heater must be installed. Depending on the type of stove, you may need the help of a professional. In the case of an electric oven, an electrician who can safely connect the oven. Unfortunately, the furnace does not come with any accessories. In addition to the power cable, you will need a short supply line that goes from the distributor to the barrel sauna. In relevant forums, it is now recommended to heat up the sauna for the first time, so that all harmful substances from the stove, as well as any varnish located are burned out.
Rain Protection and Sealing of Barrel Sauna
When the basic framework of the barrel sauna is in place, the complete barrel sauna should first be painted from the outside with a water-based glaze. It is very important that the painting is really done only from the outside. The inside remains untreated. The manufacturer recommends to fill the slots in the windows and doors with assembly foam. However, we did not find a “healthy” option, so we decided to use elastic foam tape.
It is generally recommended not to compress the sauna in all places, as there is a risk of mold growth. After all, the wood needs to breathe. Nevertheless, waterlogging should be avoided. Baltresto shows in the instructions to inject silicone below the front and back walls. The reason for this is that in all barrel saunas, rainwater tends to creep in there and cause stains inside the sauna and possibly form mold. Therefore, silicone should be injected at least below the joints. Here, too, the question arises as to what extent health concerns play a role. As a better alternative, we have been recommended Sikaflex, which also copes with high temperatures and humidity on wood. Sikaflex has long been used in industry and is an effective bonding and insulating agent. Sikaflex comes in a variety of colors to visually match the wood. Please use only outside and never inside the sauna.
Barrel Sauna Usage. Maintenance tips
In order for the barrel sauna to come up to temperature, all openings, especially the door and windows should be closed so that the sauna heats up faster. To get to 90 degrees the sauna needs about an hour. However, the time required also depends on the external conditions.
After the sauna session, it is important to ventilate the sauna sufficiently. For this purpose, the door and windows should be opened for about 20 minutes. In addition, it is recommended to leave the small openings open, so that the sauna is ventilated a little throughout.
If you have followed all these steps, nothing will stand in the way of your sauna session. Baltresto barrel sauna is really fun and a long-term investment for everyone’s future and health.
Conclusion
Baltresto offers a high-quality barrel sauna in the mid-range. Of course, there are other manufacturers who are a little cheaper, however, Baltresto also consider long-term superstructures and provides here with various optimizations better with. In addition, the sauna has a considerable thickness of 40mm. On the whole, we are very satisfied with the Baltresto barrel sauna. Only the instructions consisting only of pictures, are very difficult to “read”. Since we would like to see a little more text and also “close up” drawings in which you can see the components better. Partly we had to look at pictures of other barrel saunas during the assembly so that everything makes sense. In total, it took us two days to assemble and we now have a gorgeous barrel sauna in our backyard at home.